Hello again, this is eric with another kind of tutorial for you. 2ma2 wrote a tutorial about this subject also, but I wanted to offer another solution, in case you don't scan drawings or just want another solution. So let's begin:
Aliased outline with Anti-Aliased insides
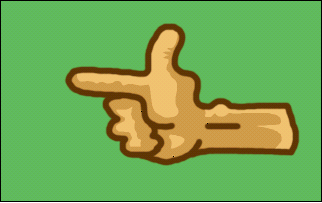
Ok, so I drew a quick image.
This was drawn quickly with the paintbrush so that means that everything is aliased [meaning has fuzzy edges].
Now, if we import this into AGS, it will have a fuzzy halo around it because AGS doesn't handle the aliasing very well. So what we are going to do is get rid of the aliasing on the outside of the image but not the inside.
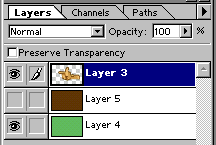
First thing we do is make a new layer and fill it with the colour of our outline. Like in the image to the left.
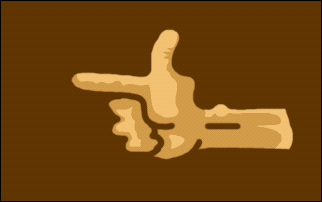
The image should look like this
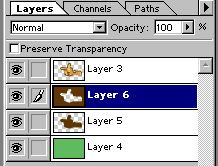
Then we select the area around the hand with the magic wand with Anti Aliasing turned off. Like so...
I added a smoothing to the selection of 3 just to get rid of any awkward selection that might have occurred...

And that's about it, I get rid of the brown area I don't need [not that brown that looks like the hands shadow] and maybe after a few pixel cleanups here and there, the image is done.
Now it can be imported into AGS without the worry of a halo.
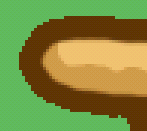
A close up showing aliased outline
and anti-aliased inside.
That's really all there is to it. Maybe that is helpfull, and maybe it wasn't. But it only takes like 1 minute to do and works quite well I believe. So enjoy!
eric